Thursday, December 29, 2011

KS Timber Wagons

KS Scantling Timber Wagon


The KS wagons are similar to the KT's and were built shortly after. KT 1 was in fact converted from a KT. There were only 7 in the class, built in 3 different ways! The first five though are the same and were built lat 1958 early 1959.

Using the knowledge we have gained from building the first three KT's we have just about come up with the best way to do the timber stakes (apart from etching and then casting them). the next two KT's under constructing have refined the process more.

The decal on the right reads "Scanting Timber Only between Orbost & Graham". It is barley legible, at about 0.3mm high!

So in 3 days we have built 7 wagons... at this rate I need to take a month of work and just build rollingstock!

So two classes of timber wagon done, a third underway... and the forth, the IT will wait for a bit.

BLMA 18" hand grabs on KS wagon


Wednesday, December 28, 2011

KT Timber Wagons

L-R Original test, Rob's weathered, John's first scratch built wagon


In between several other projects Johna and I have being building some KT wagons. This was Johns first go at scratch building and he has done an excellent job!

Forty five KT wagons were built in 1956/57 using late model IY under frames to carry pulp wood, from g Bairnsdale to Maryvale paper mill. This traffic lasted until the late 1960's/early 1970's.

The wagons were then modified for "scantling timber" (sawn timber) with the two centre partitions removed and the stanchions re-arranged, however they kept the KT classification. In 1972-73 22 wagons were used to make the IS class where the wagons were lengthened by about 2 feet. See photos at Mark Bau's excellent site:
http://www.victorianrailways.net/freight/freight%20pages/kt/kt.html

I drew the wagon up in Corel Draw with the intention of etching it at some stage. I decided to "test" the drawing by making out of 10 thou styrene. That became the original. Here it is almost finished.
First attempt

I found a few things to improve, in particular how the stanchions are attached, which I dutifully changed on the drawing. These also needed to be tested and as we both had a free night John came around for some modelling. We set to work on the second version, and this became John's first scratch built wagon.

Today I painted them both and weathered mine a bit. A timber load was made up from scrap styrene and painted. 


I've found a few things to change again before I do the etched version. I plan to make the drawing and a blow by blow scratch build of these in a future blog/article.

So now the layout has the first of a series of different timber wagons it needs... only about four more versions to go!

L-R first attempt, Rob's, John's


Friday, December 16, 2011

Nowa Nowa Sawmill Module Part 1

I've been doing a bit of work off and on this week on the modules. The key one at the moment being the Nowa Nowa Sawmill module.

Located west of the station, on the other side of Boggy creek this rarely photographed (I have only 1 so far...) location makes an interesting module.

From the Boggy creek the track curved left through a deep cutting, the road bridge to Bruthen passed over the line at this point, it then curved back to the right where there was a siding to the sawmill. These two tracks were very short to take only a couple of I/GY wagons. A timber bank (which I have the plans for from the archives) faced one track where timber was loaded by forklift into the wagons.

Here is the progress so far. The module is 9mm ply deck, a 70x19 Form Ply stringer runs the length of the module, 19mm Form Ply makes the ends and eventually the sides will be made from 6mm ply.

The module is cut to match the end of the Boggy Creek module, to then bring the line back parallel to the Nowa Nowa yard tracks by the end.

I'm using the "Trackrite" foam roadbase, I bought some a while ago and this will be the first time I've used it. It has a nice chamfered shoulder for the ballast. Glued down with White Glue.


Here is the track complete, soldered together, track feeders added and frog powered on the points... just need Phil to come along to make the wiring look good underneath!

As I drilled holes for the wiring I found that while I thought I had left plenty of room for the stringer to go through without getting in the way of the points... I hadn't :( So out with the jigsaw... pictures another time.


Trains from Nowa Nowa itself were allowed to shunt these sidings without having to take a guards van, here is a typical train returning from the sidings (to the left of the picture) heading back to Nowa Nowa station (to the right).


Friday, December 9, 2011

New Modules Begin

Today we (mostly my Dad as I supervised, still not allowed to do much after the operation) reduced an 1800x1200x19mm sheet of "Form Ply" into the end plates and stringers required for the new modules.

Construction will commence tomorrow.

Need to build:
Two 400mmx400mm "filler" modules. One for the area between "Nowa Nowa" and "Boggy Creek Bridge" modules and one for between the two 90 degree corner modules. These will feature a 9mm top, 6mm sides of ply and the "Form Ply" end plates.

Two 90 degree corner modules. These will have two "Form Ply" stringers, 6mm deck, blue foam and 3mm curved fascia's.

Nowa Nowa Sawmill. This is a 1200mm module with a "kink" to bring the alignment back parallel after Boggy Creek Bridge. It will feature a 6mm deck, blue foam, 70mmx19mm "Form Ply" stringers and 6mm fascia's. this module will have two points on it.

Bairnsdale. This will be three 1200mmx400mm modules with either 9mm or 12mm decks (not sure which yet) and 6mm ply sides... hopefully I can get away without any support timber...

Busy week of construction ahead!

Ordered the track last week, it should arrive late next week, however I have enough points to do the ones off the main.

Cheers

Rob

Tuesday, December 6, 2011

Bairnsdale In N Scale

G'Day all, it has been decided that the next major station to link with Nowa Nowa will be Bairnsdale. I have therefore set up a new blog to record the research and building. It is located here:

http://bairnsdalenscale.blogspot.com/

Design work has commenced, as has research in earnest. I am always looking for more material, so please pass it on if you have any.

In reviewing the development of Nowa Nowa in n scale I have realised I should have done more research up front, however the concept sort of "grew" and took advantage of opportunities of time and space.  Bairnsdale will be developed in a more deliberate fashion, in fact I hope to build things like buildings first, even before laying the track... we shall see how that goes!

However as you can see by the following concept plan we have a number of other modules that need to be built as well. The Nowa Nowa sawmill sidings, two 90 degree bends and several 400x400mm "filler" modules. these will be documented on this blog, while the other blog will focus on Bairnsdale.

6mx3m concept, complete modules in green
The overall plan will fit nicely in the shed and will be a useful size for model railway exhibitions where it will be viewed from three sides. It will keep 3-5 operators amused :)

On On!

Sunday, November 27, 2011

Advertising U Vans

Over the last few days I've been working on a number of projects for customers and myself. One that has been on the list for a while has been additional advertising U vans using the Signs Of All Kinds Alps printed decals (http://www.aust-n-rail.com.au/category6_1.htm) on one of my undecorated U Vans ANR 3868).

First I open the decal and apply a light coat of Testors Decal Bonder to the decal (http://www.testors.com/product/0/9200/_/Decal_Bonder) in case the decal film is weak or old (the decal bonder applies a new film layer, just don't make it too thick). Set it aside to dry for a few hours.

Then taking an undecorated U van out of the pack remove the roof by holding the long side on both side and pulling it off with a firm pull. Remove the body from the chassis by depressing the tabs you will now see. Depending on the paint scheme you may need to paint the roof separate to the body, or combine it and paint as one assembly.

Now paint the model then once dry apply a cleat gloss coat (I use Tamiya TS 13 in a spray pack). Apply the decals using water and once positioned dry off the water. Now comes the important part, to get the decal to snuggle down into the louvres apply Microscale Microsol. This may need to be done several times (1 did 4-5 applications on the models below). Once dry apply a matt coat (Testors Dullcote).

Cane-Ite
Painted all over in Badger Modelflex/Accuflex Light Oxide Tuscan Red (My "standard" colour for VR wagon red of late 70's onwards)

Edinburgh Paints
Roof Modelflex/Accuflex Light Oxide Tuscan Red, side Badger Modelflex/Accuflex Southern Pacific Scarlet Red.

Orlando Wines
Body roof in Badger Modelflex/Accuflex Maroon Tuscan Oxide Red (older VR brown/red), side in the colour I use for AN green (Badger Modelflex/Accuflex Burlington Northern Green with a dash of black).


Better get back to finishing the other models :)

Wednesday, November 23, 2011

Brass Tank Stand

The stand for the water tank was quickly made out of styrene strip for a show. The intent was always to do a brass one to give greater strength. The problem was getting brass angle that was fine enough which I finally did from here :http://www.metalsmith.co.uk/

So here are some pictures of the new stand with the old platform and tank. I have used the 1mmx1mm angle throughout, although the diagonal cross braces should be a little finer.


Now the stand is much strong and will take bumps better!

Thursday, November 17, 2011

Victorian N Scale Collective Meeting Oct 2011

Catching up on a couple of missed months due to work :(

The Victorian N Scale Collective (http://home.vicnet.net.au/~vnsc/) October meeting was hosted at my place in Seymour. We had an excellent turnout with many north central country members able to make the drive.


Here is a picture of some of the crew enjoying a chat.


Inside more of the crew spent time actually running trains. Despite the photo evidence they said they did enjoy it... maybe they are reconsidering not modelling the East Gippsland line... Darren looks happy, but then he IS modeling the East Gippsland line.

In addition to my layout we had Tony Lamplough's "Fish Creek" set up. More on that in the next blog.

The VNSC are a great and growing (over 80 members) bunch of keen N scale modellers of all ages and modelling skills. I can highly recommend joining them if you are modelling Victorian Railways, or N scale in general!

Wednesday, September 14, 2011

Latest Photos Darren French's layout

There are currently a couple of fantastic Victorian N scale layouts under construction. In addition to Wallan, Tony Scott, Tony Lamplough and Darren French's layouts are nearly scenery complete in a few/most areas. The great thing about this is as we are all members of the Victorian N scale Collective so ideas and experience are being freely given, enhancing all of our layouts.

These are some of the latest pictures of Darren's layout. He built the Nowa Nowa bridge for me, but has gone even further on his layout... maybe he has spare time for a FreeMoN version of Stony Creek...

Darren likes trestle bridges... if you hadn't noticed! Here two super detailed Aust-N-Rail series 2 T's (with fibre optic lighting) lead a Louvre van train with a Spirit Design ZLP, an Aust-N-Rail VLEX and a number of Fybren Models VLCX vans.

Did I mention someone has a trestle bridge fetish...


I was about to say he does other scene's apart from trestle bridges... but maybe not!

Here a super detailed Aust-N-Rail Series 1 T class leads an Aust-N-Rail WOAX (Master by John Miller) and a series of four wheel rolling stock from Spirit Design and Aust-N-Rail over... a small trestle bridge...

Thanks Darren for the pictures and inspiration!

Cheers

Rob

Sunday, August 14, 2011

Swimmers at the water tank

My goodness, almost a month since the last post... in prep for the Caulfield show next weekend we've been adding some details. Painting period vehicles and starting to make some scenes to give more life to the layout.

I've been thinking about the following for a while, so I hunted through my boxes of "stuff" put away for rainy days (today we had sunshine though...), found some figures, and a diecast "Beetle", and started painting...

What exactly are the guys on the bridge photographing...

This guy really wants to know...

Friends of one of the Gangers? Popular lad then...

Cheers

Rob

Monday, July 18, 2011

Building the VR 10000 Gallon Water Tank Stand Pt 3

Ok managed to get more done, this is the model in undercoat.


The filler pipe is a bit of sprue from a 1:144 scale model airplane suitably shaped. The bottom bracket is two 4mm pieces of T shape joined by some 20x20 thou. The wheel is a spare for an ELX :). Ladder is a Slaters product, and is placed over the join so you can't tell :)

Here it is basically painted. They were painted "aluminium". I need to do a decal for the indicator that shows how much water is in the tank. I will then weather...

Saturday, July 16, 2011

Building the VR 10000 Gallon Water Tank Stand Pt 2


Well after months of “thinking” AKA “procrastinating” in 24 hrs I’ve now built the bulk of the water tank!

I always considered the difficult part of this project to be the tank itself. I have been looking around for suitable cylindrical objects to cut down... to little effect except collect more “stuff”.

I had considered ”rolling up” some styrene...I even had a suitable product from the N Scale Architect http://www.thenarch.com/products/small-welded-plate-ho-n... but still the procrastination continued

After last night’s success with the stand this morning I gave it a go, and I’m very pleased with the result!
I still plan to do this as an etched kit “some day” but now Nowa Nowa has a water tank!

Prototype then model so far... still some work to do but looking the part!


Building the VR 10000 Gallon Water Tank Stand


Long time, no posts. The main reason is the new shed, most of my spare time has been used “helping” my father (who ended up doing most of the work, thanks Dad!) put up the interior walls and lining the shed. It isn’t fully complete, and won’t be for some time, but the business part is now done... and there is room to set up Nowa Nowa!

My other problem has been modellers block. Nowa Nowa is starting to near the end game... the easy bits are done, only the finishing touches to go... Except for one major item, the Water Tank/s!

Originally there were two 10,000 gallon water tanks at Nowa Nowa,  one was removed in the late 1970’s while the other remained. I’ve been trying to get plans for this type of tank (fairly common VR style) and have largely failed. There is one here at Seymour and I’ve used some measurements from that, plus estimates to build the following model.

I have been procrastinating on this for a while, I really need to etch the furnishings and I was going to etch the stand... I also need to do the tank which is about 15ft across... to many things so I focussed and started eating the elephant last night by building the tank stand from styrene strip!

First I draw the plan in Corel Draw, then I superglued the strip to the plan which looks like this:

I let that dry for a couple of hours then removed the backing paper and assembled the four parts so now it looks like this:


I’m pretty happy with it, a couple of areas need to have some superglued removed.

And now another things I’ve been procrastinating on, updating the blog, is done!

Thursday, May 26, 2011

AUST-N-RAIL and Nowa Nowa's new Home

Over the last few months we have been preparing the backyard for the new home of Aust-N-Rail and Nowa Nowa... it is now externally complete! It is a 7.4mx11mx5m shed with a large mezzanine area, room for all "the stuff" to come out from the house. My son is already planning for he and I to sleep there... once we get a heater!


Now to line and fit it out...

cheers

Rob

Friday, April 29, 2011

Post Activity Report Nowa Nowa at Hobsons Bay Show 2011

As posted in the Australian Free-moN groups.

Background
“Nowa Nowa” has been a long term ‘dream” of mine to build in N scale. After my major operations last year I had a little bit of time to recover, and decided to give it a go. Originally planned to be a “shunting layout” as a break from my T-TRAK “roundy roundy” during discussions with Phil Hillebrand he convinced me to go the Free-moN rout. I was aware of Freemo-N, in particular in European practice, so it didn’t take a lot of convincing!

However an early departure was made from the “Australian Draft” standard in that Peco Code 55 track was used internally, with 100mm of ME code 55 at each “interface” as per the spec. The key reason was that the Peco Code 55 exactly matched the sleeper spacing  for Victoria (if not the sleeper length) which would ensure it “looked right”. A secondary consideration was the availability of compound (“slip”) points, not required for Nowa Nowa but required for most other VR stations... and we had plans for future growth.

We accepted that there would be some loss of “running reliability” compared to the modern US code 55 products, but having built about four-five layouts with Peco I was comfortable we could handle it. I wanted the look right and reasonable running, vs great running but looking “wrong”.


Hobsons bay Setup
We set up the “minimum” size layout for Hobsons bay consisting of the “Nowa Nowa” module (which is about 80% to scale), the Boggy Creek module (also almost to scale, with Darren French making an AWESOME representation of the bridge, again thanks!) and the two “traverse” fiddle yards. Points were powered by DCC Concepts “Cobolt” point motors, thrown via DCC command (we didn’t get the control panel built in time), using a Lenz DCC system of command station, two boosters and three throttles (one throttle largely dedicated to throwing points).

The modules were setup on our T-Trak portable tables, chocked up a bit on blocks of wood.

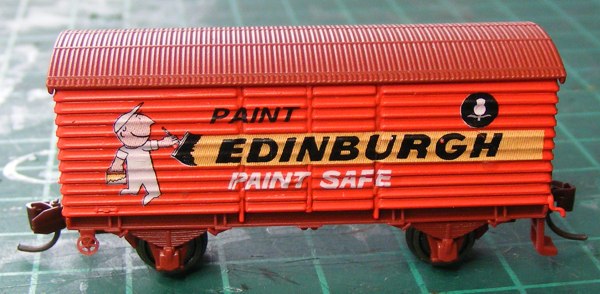
Motive power was two series 3 T class, a series 2 T class (all using Kato NW2 mechs with TCS decoders) and a B class (with an Atlas SD7 mech and TCS decoder). Rollingstock was largely Aust-N-Rail RTR models (GY, B, U, ELX), Aust-N-Rail and Spirit design kits (including a W set and an E set of pass cars built by Paul Blake and myself).

In addition to the layout a few colour photos from various sources was used to show how close (or not) we were to the “real thing”.

Observations
Overall the layout was very well received, and demonstrated Australian N scale trains running smoothly, slowly and shunting in a realistic Australian setting.

Comments from people who had seen the real Nowa Nowa station before it was pulled up was that we had “nailed it”.

Some people felt that a skyboard would have enhanced the model.

Sustains
1.       Use of Peco code 55 Track. While we did have a couple of derailments (largely caused by rollingstock with “Romford” wheels, which were then replaced) the looc of the track was great. In addition when put against the ME Code55 track we noticed the ME track appeared “coarser”. Upon taking measurements we found that the rail head width of the ME track is approximately 25% wider. Recommendation. Tthat the Australian N scale standard is changed to Peco Code 55 when representing Australian locations.

2.      The “transfer” fiddle yards. While more work than I originally expected, and requiring the use of “stuff” with a high tolerance (like very good quality drawer systems, and latches) these worked brilliantly, saving lots of space and giving lots of operational work for a relatively small layout. Recommendation. That these modules are describe in the standards as an exemplar.

3.     “Organic feel”. Freemo-N supported a very “organic feel” layout that really allowed us to capture the location with minimal modification. I would use this approach again. Recommendation. That “organic” modules are encouraged.

4.       Tables. The use of portable tables work really well, enabled a quick setup and a useful surface to put things on (instead of the layout). We used 90mm blocks, a bit higher would have been good, but many members of the public appreciated the lower layout height. Recommendation. This method is recognised as a viable alternative to the freestanding module concept.

Improves
1.     Control Panel. While the use of the DCC system worked well, a control panal for the main yeard would have enhanced the experience. Recommendation. Control panels remain a core part of the standard.

2.     Use of Plywood. We largely used plywood in construction, but used some dimensional lumber in the “fiddle” yards. There is a possibility that this held to contribute to some issues (however too fine a tolerance was the main culprit). We used a 12mm and a 6mm pieced of plywood for end plates (as being in the country we had limited access to choices). This method worked well and 18mm is about “right”. Recommendation. Continue to encourage the use of plywood for construction.

3.     Skyboard. For exhibitions I agree a skyboard would have enhanced the  mode. Doing that with the free-flowing shape of Nowa Nowa will be a challenge though. While Freemo-N is targeted at enthusiasts operating, not an exhibition layout for shows, I think it is important to promote the concept. Recommendation. Consideration to a optional skyboard, in particular “height”, in the standards.

Conclusion
The builders (Phil, Ashley, Darren and myself) are very happy with how things came together. The operators over the weekend, Martin, Barry, Phil, my 5 year old son Ryan, and myself) had a lot of fun (Barry and Martin, remember NO 5 finger shunting!), and the public received the model very well.

We are now planning several further modules... looks like the entire East Gippsland line from Sale and Maffra to Orbost is a possibility....

The following photos courtesy of David Bromage, thanks David!
Phil talks near the transfer "fiddle" yard while Barry runs trains.

A closer shot of the transfer fiddle yard. Good quality kitchen drawer slides and accurate alignment and building were pre-requistites for these succesful modules.

A week of extra work (not otherwise reported on the blog to date) has the layout at around 90% completion, more details and two water tanks to go!

More pictures of the show and Nowa Nowa are here:
https://picasaweb.google.com/david.bromage/HobsonsBayModelRailwayExhibition2011#


Monday, April 18, 2011

Boggy Creek Bridge Module

It was a busy day today, in addition to Phil bringing back Nowa Nowa all working, Darren dropped off the Boggy Creek bridge module... accompanied by banter about "Rob's layout" being built by everyone else... what else do you expect from a Project Manager!

Darren has done a fantastic job on the module and the bridge... it REALLY capture the feel of the bridge, just need some trees! Over the next few days I will lay the track and ballast it, plus start putting on trees... in fact have already started :)


They layout is coming together nicely just a few days out from its first showing at the Hobsons bay show at Collingwood over Easter. Phil "just" needs to finish off the two fiddle yards... but already we are planing the next few modules... it is addictive!

Points wired and working

Phil has been busy the last few days! Today he dropped off Nowa Nowa with all the points wired up with the DCC Concepts Cobolt point motors, powered by DCC concepts decoders. We set it up and started running trains, great to call up a point on my LENZ system, and throw the switch backwards and forwards... Phil is was worth all your efforts :)

Here is a picture of the wiring underneath, far neater than anything else I've had.. having professionals do your work is always good!

Cheers

Rob

Saturday, April 16, 2011

Visit To Nowa Nowa 2011

G'Day all, sorry for the long gap in posts, been real busy with work. However the last week I visited family on the south coast of NSW... a good excuse to go via Nowa Nowa!

I will be post some more pics of the layout as we have a week before its first showing at the "Hobsons Bay " show at Collingwood on the Easter long weekend... we were hoping to get further along, but it will be worth coming to have a look :)

Anyway here are some pics of Nowa Nowa in 2011.

First looking back towards Orbost. On the left is the "New" loading dock, in the centre the track that lead to to back sidings, in the middle distance the old loading dock. The old dock was flat, but the new one has a slight curve back on the wings... I've modelled both as being flat. On the far right is a gap where the long dead end siding off the main goods loop was.


Here is the few back towards Bairnsdale and the Boggy creek bridge. On the hill just to the right of centre was where the original wooden loading ramp was.


Here is a pick of the original wooden ramp. The shot is from the hill on the picture above looking towards the right.


And here is a picture of the footings for the old wooden loader.

Sunday, February 20, 2011

Series 3 T samples

What I remember most from my railway inspired youth was the Series 3 T's in Bairnsdale yard. Occasionally (once a week or so) the schoolbus, for reasons unkown, would drive from Paynesville, into Bairnsdale and would drive own the road past the station. I remember seeing the first VLINE T3 as well (this route is now largely blocked from view).

Below are the samples of our next ready to run product, the Series 3 T. I drew the bulk of the artwork in hospital in Jan/Feb 2010, and Peter Boorman finished the artwork off, arranged the etchings and assembled the master. These samples and the master should depart for China on 22 Feb 2011.

A number of these locos are needed on Nowa Nowa!